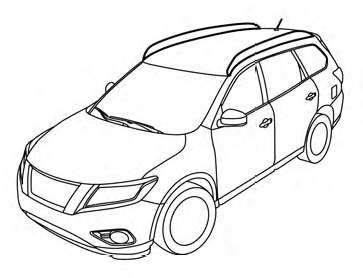
Roof rack (if so equipped)

Genuine NISSAN accessory cross bars are available through your NISSAN dealer. Contact an NISSAN dealer for crossbar or other equipment information.
Always distribute the luggage evenly on the cross bars. Do not load more than 150 lb (68 kg) on the cross bars. Observe the maximum load limit shown on the cross bars or roof carriers when you attach them on the roof cross bars. Contact an NISSAN dealer for crossbar or other equipment information.
Do not apply any load directly to the roof side rails. Cross bars must be installed before applying load/cargo/luggage to the roof of the vehicle.
Be careful that your vehicle does not exceed the Gross Vehicle Weight Rating (GVWR) or its Gross Axle Weight Rating (GAWR front and rear). The GVWR and GAWR are located on the F.M.V.S.S. or C.V.M.S.S. certification label (located on the driver’s door pillar). For more information regarding GVWR and GAWR, see “Vehicle loading information” in the “Technical and customer information” section.
WARNING
● Drive extra carefully when the vehicle is
loaded at or near the cargo carrying
capacity, especially if the significant
portion of that load is carried on the
cross bars.
● Heavy loading of the cross bars has the
potential to affect the vehicle stability
and handling during sudden or unusual
handling maneuvers.
● Roof rack cross bars should be evenly
distributed.
● Do not exceed maximum roof rack
cross bars load.
● Properly secure all cargo with ropes or
straps to help prevent it from sliding or
shifting. In a sudden stop or collision,
unsecured cargo could cause personal
injury.
CAUTION
Always install the cross bars onto the roof side rails before loading cargo of any kind.
Loading cargo directly onto the roof side rails or the vehicle’s roof may cause vehicle damage.
See also:
Luggage cover (CrossCabriolet models)
A luggage cover is used to separate the trunk
and the top storage area.
To use the luggage cover, pull it out and hang
both sides on the hooks1 .
To stow the luggage cover, remove it from th ...
Readiness for Inspection/Maintenance (I/M) test
WARNING
A vehicle equipped with All-Wheel Drive
(AWD) should never be tested using a
two wheel dynamometer (such as the
dynamometers used by some states for
emissions testing), or similar equipme ...
Rear and rear-wide view monitor with Moving Object Detection (MOD) (if so
equipped)
When the shift lever is shifted into the R
(Reverse) position, the monitor display shows
view to the rear of the vehicle.
The system is designed as an aid to the driver in
detecting large statio ...
