Head restraints (3rd row)
WARNING
Head restraints supplement the other vehicle safety systems. They may provide additional protection against injury in certain rear end collisions. Adjust the head restraints properly, as specified in this section. Check the adjustment after someone else uses the seat. Do not attach anything to the head restraint stalks or remove the head restraint. Do not use the seat if the head restraint has been removed.
If the head restraint was removed, reinstall and properly adjust the head restraint before an occupant uses the seating position. Failure to follow these instructions can reduce the effectiveness of the head restraints. This may increase the risk of serious injury or death in a collision.
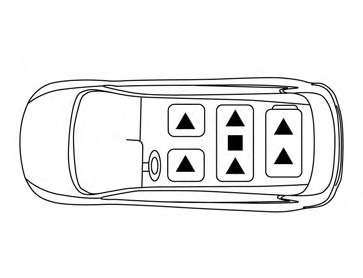
The illustration shows the seating positions equipped with head restraints. The third row head restraints do not adjust but are removable .
▲ Indicates the seating position is equipped with a head restraint.
■ Indicates the seating position is equipped with an adjustable headrest.
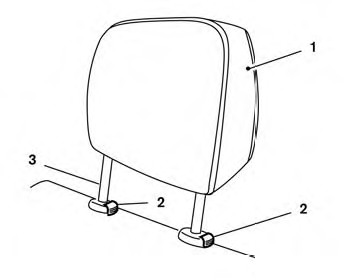
Components
1. Head restraint
2. Lock knobs
3. Stalks
Removal
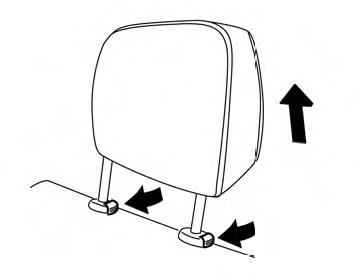
Use the following procedure to remove the head restraints.
1. Adjust the seat or seatback as necessary.
2. Push and hold both lock knobs.
3. Pull the head restraint up until it is removed
from the seat.
4. Store the head restraint properly so it is not
loose in the vehicle.
5. Reinstall the head restraint to the locking
position and properly adjust the seat or seatback
before an occupant uses the seating
position.
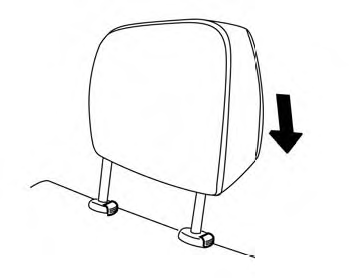
Install
1. Align the head restraint stalks with the holes
in the seat. Make sure the head restraint is
facing the correct direction.
2. Push the head restraint down until it locks in
place.
See also:
Engine compartment check locations
VQ35DE engine
1. Power steering fluid reservoir
2. Engine coolant reservoir
3. Drive belt location
4. Fuse box
5. Engine oil filler cap
6. Brake fluid reservoir
7. Air cleaner
8. Fuse box
9 ...
Pregnant women
NISSAN recommends that pregnant women use
seat belts. The seat belt should be worn snug and
always position the lap belt as low as possible
around the hips, not the waist. Place the shoulder
belt ...
Entry/exit function
This system is designed so that the driver’s seat
and automatic operation steering column will automatically
move when the shift selector is in the
P (Park) position. This allows the driver to ge ...