Head restraints (1st row only)
WARNING
Head restraints supplement the other vehicle safety systems. They may provide additional protection against injury in certain rear end collisions. Adjust the head restraints properly, as specified in this section. Check the adjustment after someone else uses the seat. Do not attach anything to the head restraint stalks or remove the head restraint. Do not use the seat if the head restraint has been removed.
If the head restraint was removed, reinstall and properly adjust the head restraint before an occupant uses the seating position. Failure to follow these instructions can reduce the effectiveness of the head restraints. This may increase the risk of serious injury or death in a collision.
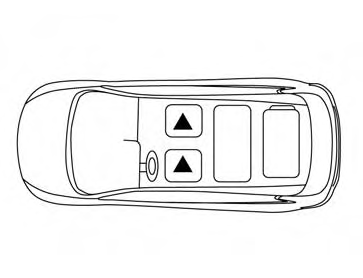
The illustration shows the seating positions equipped with head restraints. The first row head restraints are adjustable.
▲Indicates the seating position is equipped with a head restraint.
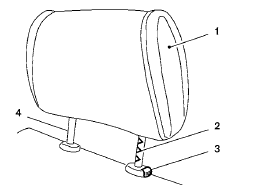
Components
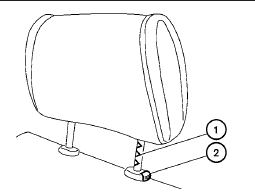
1. Head restraint
2. Adjustment notches
3. Lock knob
4. Stalks
Adjustment
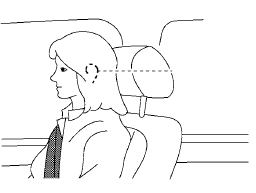
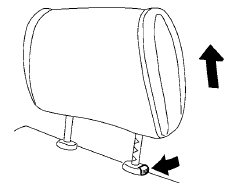
Adjust the head restraint so the center is level with the center of the seat occupant’s ears.
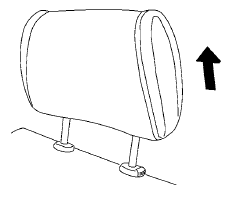
To raise the head restraint, pull it up.

To lower, push and hold the lock knob and push the head restraint down.
Removal (head restraints without Dual head restraint DVD system only)
Use the following procedure to remove the adjustable head restraints.
1. Pull the head restraint up to the highest
position.
2. Push and hold the lock knob.
3. Remove the head restraint from the seat.
4. Store the head restraint properly so it is not
loose in the vehicle.
5. Reinstall and properly adjust the head restraint
before an occupant uses the seating
position.
Install
1. Align the head restraint stalks with the holes
in the seat. Make sure the head restraint is
facing the correct direction. The stalk with
the adjustment notches 1 must be installed
in the hole with the lock knob 2 .
2. Push and hold the lock knob and push the
head restraint down.
3. Properly adjust the head restraint before an
occupant uses the seating position.
See also:
Meters and gauges
1. Instrument brightness control switch
2. Tachometer
3. Speedometer
4. Fuel gauge
5. Warning/indicator lights
6. Trip computer switch
7. Dot matrix liquid crystal display
— Trip computer
...
Automatic operation
Cooling and/or dehumidified heating
(AUTO)
This mode may be used all year round as the
system automatically works to keep a constant
temperature. Air flow distribution and fan speed
are also cont ...
Special winter equipment
It is recommended that the following items be
carried in the vehicle during winter:
• A scraper and stiff-bristled brush to
remove
ice and snow from the windows and wiper
blades.
• A sturdy ...