
Install
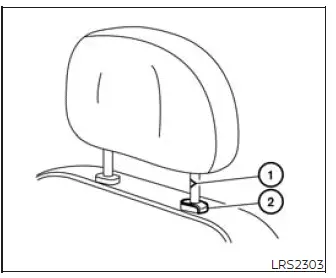
1. Align the head restraint/headrest stalks with the holes in the seat. Make sure the head restraint/headrest is facing the correct direction before pushing it into place. The stalk with the notch or notches 1 must be inserted into the hole with the lock knob 2 so the locking mechanism can secure the head restraint/headrest correctly.
2. Push and hold the lock knob, then guide the head restraint/headrest downward into the seatback. Keep the stalks straight while lowering the component so it seats smoothly and does not bind.
3. Properly adjust the head restraint/headrest before an occupant uses the seating position. In the Nissan Murano, the head restraint/headrest should be locked and positioned for the occupant, not left loose, partly installed, or set at an unsuitable height.
Adjust
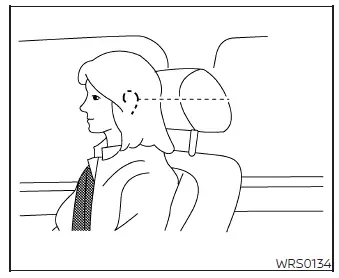
Basic Information
For an adjustable head restraint/headrest, set the height so the center of the head restraint/headrest is approximately level with the center of your ears. This position helps the head restraint/headrest provide more appropriate support for the head and neck area.
If your ear position is still higher than the recommended alignment after adjustment, place the head restraint/headrest at the highest available position. Do not ride with an adjustable head restraint/headrest set too low for the occupant using that seat.
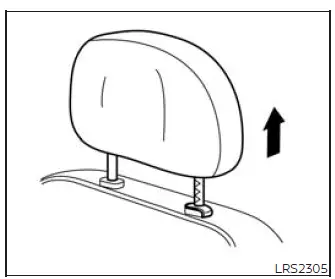
Raise
To raise the head restraint/headrest, pull it upward in a smooth motion until it reaches the desired height.
Make sure the head restraint/headrest is positioned so the lock knob is engaged in the notch before riding in that designated seating position. A head restraint/headrest that is not locked may move unexpectedly and may not provide the intended support.
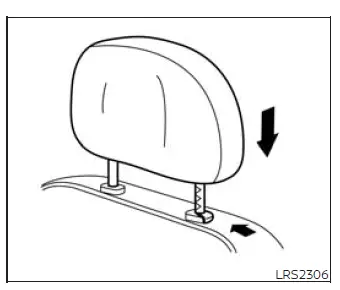
Lower
To lower the head restraint/headrest, push and hold the lock knob while pressing the head restraint/headrest downward to the desired position.
Make sure the head restraint/headrest is positioned so the lock knob is engaged in the notch before riding in that designated seating position. After adjustment, check that it does not move freely and that it is ready for passenger use.
See also:
Opening fuel-filler door
To open the fuel-filler door, push the opener
switch located below the instrument panel. To
lock, close the fuel-filler door securely. ...
Instrument panel
Vent, used to direct airflow into the cabin and help distribute heating, cooling, or ventilation from the
climate control system.
Headlight/turn signal switch, positioned for conv ...
Rear window and outside mirror (if so equipped) defroster switch
Type A
To defrost the rear window glass and outside
mirrors (if so equipped), start the engine and
push the rear window defroster switch on. The
rear window defroster indicator light on the
swi ...