
Changing engine oil and oil filter
Basic information
For engine oil and oil filter replacement, follow the instructions in this section carefully. Correct preparation, safe vehicle support, and proper installation of the drain plug and filter are essential for preventing oil leaks and engine damage.
Vehicle set-up
1. Park the vehicle on a firm, level surface and apply the parking brake securely.
2. Run the engine until it reaches normal operating temperature. Warming the oil allows it to drain more effectively.
3. Turn off the engine and wait for 15 minutes before beginning the replacement procedure.
4. Raise the vehicle with a suitable floor jack and support it securely with safety jack stands before working underneath it.
- Position the safety jack stands only beneath the designated vehicle jack-up points.
- Attach a suitable adapter to the jack stand saddle to support the vehicle correctly.
CAUTION Use only the correct lifting and support points. Positioning the jack or safety stands incorrectly may damage the Nissan Murano body or underbody components.
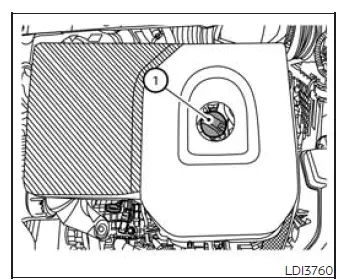
- Oil filler cap
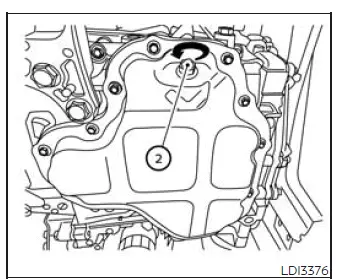
- Oil drain plug
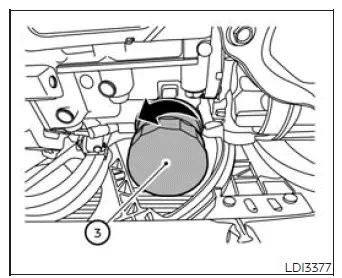
- Oil filter
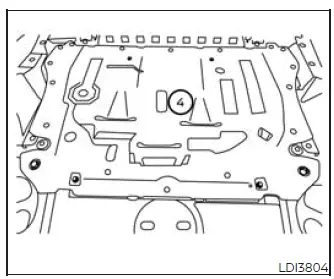
- Under engine protector
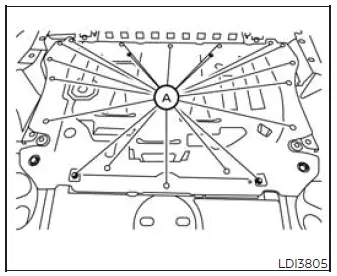
Under-engine protector
Removal of engine protectors
1. Remove fasteners A, then carefully remove the under-engine protector to gain access to the engine oil drain plug and oil filter.
Engine oil and filter
1. Position a drain pan large enough to collect the used engine oil beneath the drain plug and oil filter. Make sure the pan is placed securely before loosening either component.
2. Remove the engine oil filler cap. Opening the filler point allows air to enter while the old oil drains from the engine.
3. Using a wrench, turn the drain plug counterclockwise and remove it. Allow the used engine oil to drain completely into the pan.
CAUTION Use care when draining the engine oil, because the oil and surrounding components may still be hot enough to cause burns.
WARNING
- Prolonged and repeated contact with used engine oil may cause skin cancer.
- Avoid direct skin contact with used oil whenever possible. If contact occurs, wash the affected skin thoroughly with soap or an appropriate hand cleaner as soon as possible.
- Keep used engine oil and all oil-covered service materials out of the reach of children.
4. Loosen the oil filter by turning it counterclockwise with a suitable oil filter wrench.
Once loosened, continue turning the filter by hand and remove it carefully, allowing any remaining oil to drain into the pan.
5. Wipe the engine oil filter mounting surface thoroughly with a clean rag so the new filter gasket can seal correctly.
CAUTION Remove all material from the old filter gasket that remains on the engine sealing surface. Installing the new filter over old gasket material may cause an oil leak and subsequent engine damage.
- Make sure the dipstick remains fully inserted in its tube while refilling the engine. This helps prevent oil from spilling through the dipstick opening.
6. Apply a light coating of clean engine oil to the gasket on the new oil filter before installation.
7. Install the new oil filter by turning it clockwise. When slight resistance is first felt as the gasket contacts the mounting surface, tighten the filter an additional amount of more than 2/3 turn.
Oil filter tightening torque: 11 to 15 ft-lb (14.7 to 20.6 N·m)
8. Clean the drain plug and reinstall it with a new washer. Tighten the drain plug securely with a wrench, but do not apply excessive force.
Drain plug tightening torque: 22 to 29 ft-lb (29.4 to 39.2 N·m)
9. Pour the recommended engine oil through the oil filler opening, then reinstall and securely tighten the oil filler cap.
For the applicable drain and refill capacity, refer to "Recommended fluids/lubricants and capacities".
The actual amount of oil required may vary according to oil temperature and the length of time allowed for draining. Use the listed capacity only as a reference.
Always use the dipstick reading to determine whether the correct amount of oil has been added to the engine.
10. Start the engine and inspect the areas around the oil drain plug and oil filter for leakage.
Correct any leakage as required. Turn off the engine and wait more than 15 minutes for the oil to return to the oil pan. Check the level with the dipstick and add the recommended engine oil if necessary.
After the operation
1. Reinstall the engine protectors by following the removal procedure in reverse order. Make sure all fasteners are returned to their correct positions and secured properly.
2. Remove the safety stands and lower the Nissan Murano carefully to the ground.
3. Reset the oil control system after completing the engine oil and filter replacement.
- Collect and dispose of the used engine oil and oil filter properly. Do not place used oil with ordinary household waste or allow it to enter the ground or drainage system.
- Follow all applicable local regulations for recycling or disposing of automotive oil and filters.
See also:
Automatic window lowering
When the soft top operating switch is pressed,
the power windows will automatically be lowered
completely. The windows do not rise
automatically after the top operation is completed.
Use the pow ...
NISSAN customer care program
NISSAN CARES . . .
Both NISSAN and your NISSAN dealer are dedicated
to serving all your automotive needs. Your
satisfaction with your vehicle and your NISSAN
dealer are our primary concerns. Your ...
Parking brake
WARNING
• Be sure the parking brake is fully
released before driving. Failure to
do so can cause brake failure and
lead to an accident.
• Do not release the parking brake
from outside the ve ...